

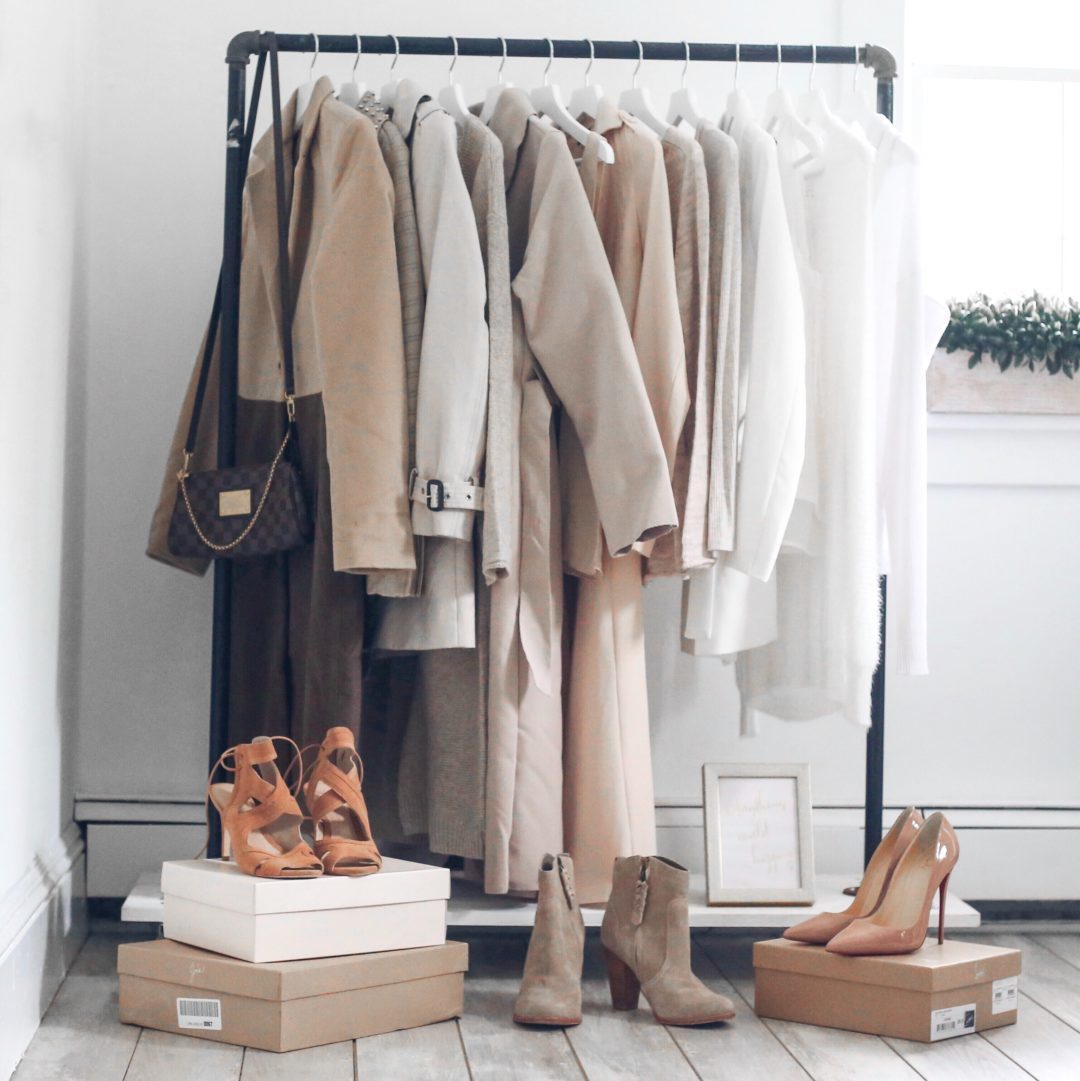
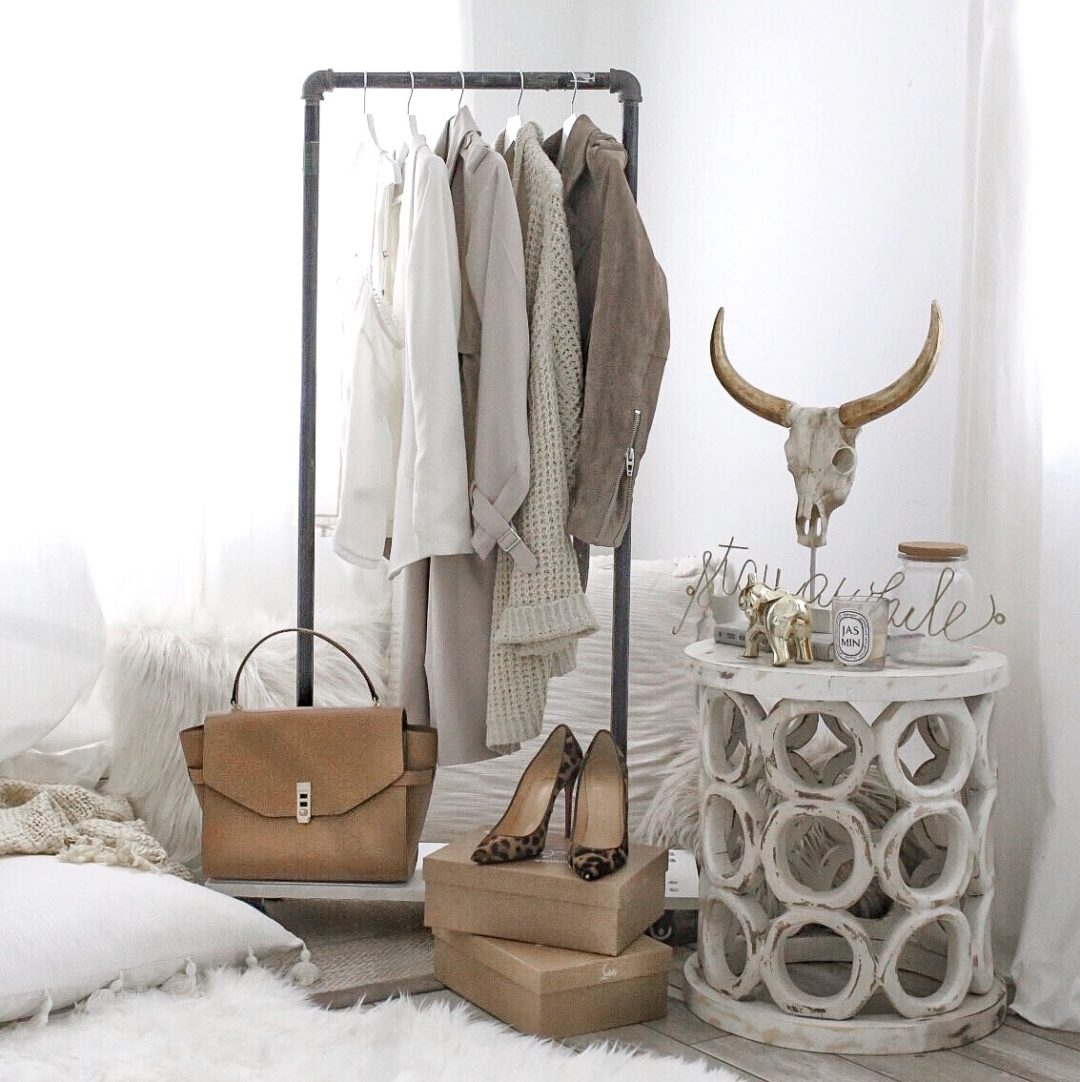
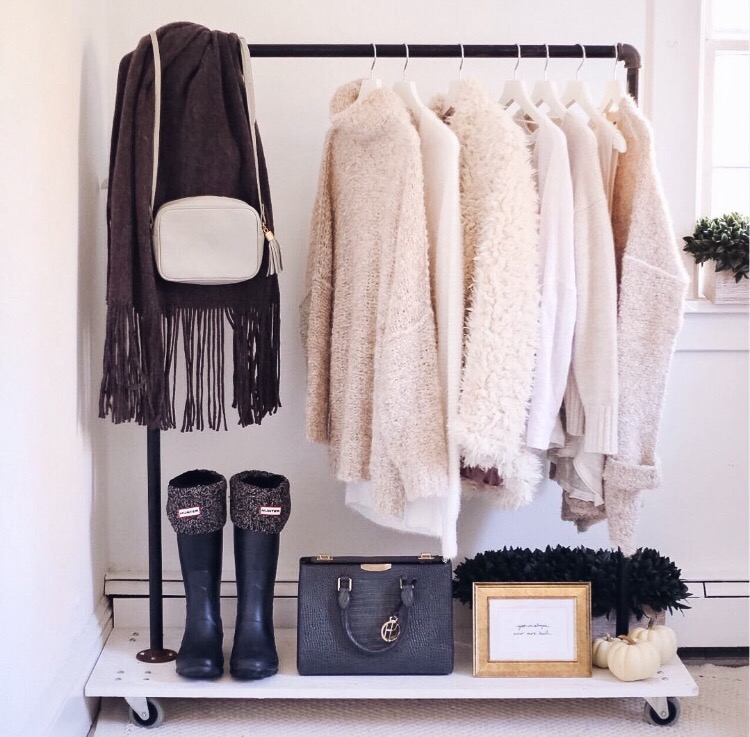
Running out of space? Are those amazing sales I always talk about creating a bit of a closet shortage? Well I have a great solution for you! Here’s how to make this simple clothing rack and keep on shopping. Problem solved!
Materials Needed:
– (2) 1” x 12” x 48” wood shelving
– 1” x 36” galvanized pine
– 1” x 4” x 8” pine
– 1” x 10” galvanized pine ( cut in half, threaded at store)
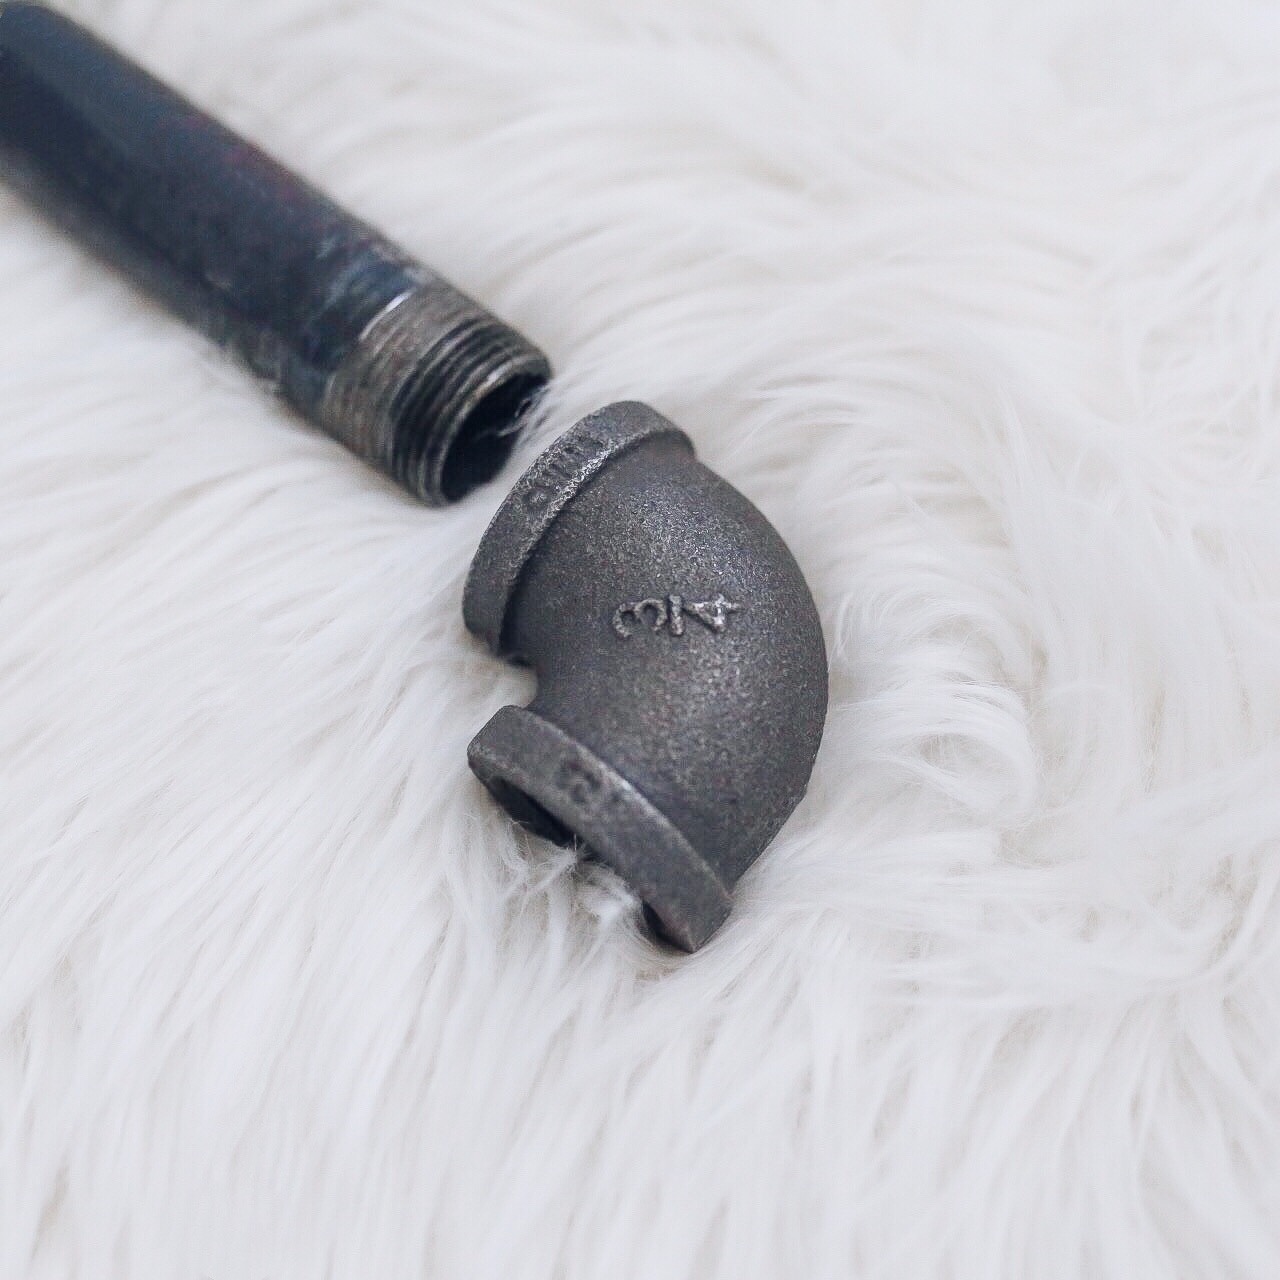
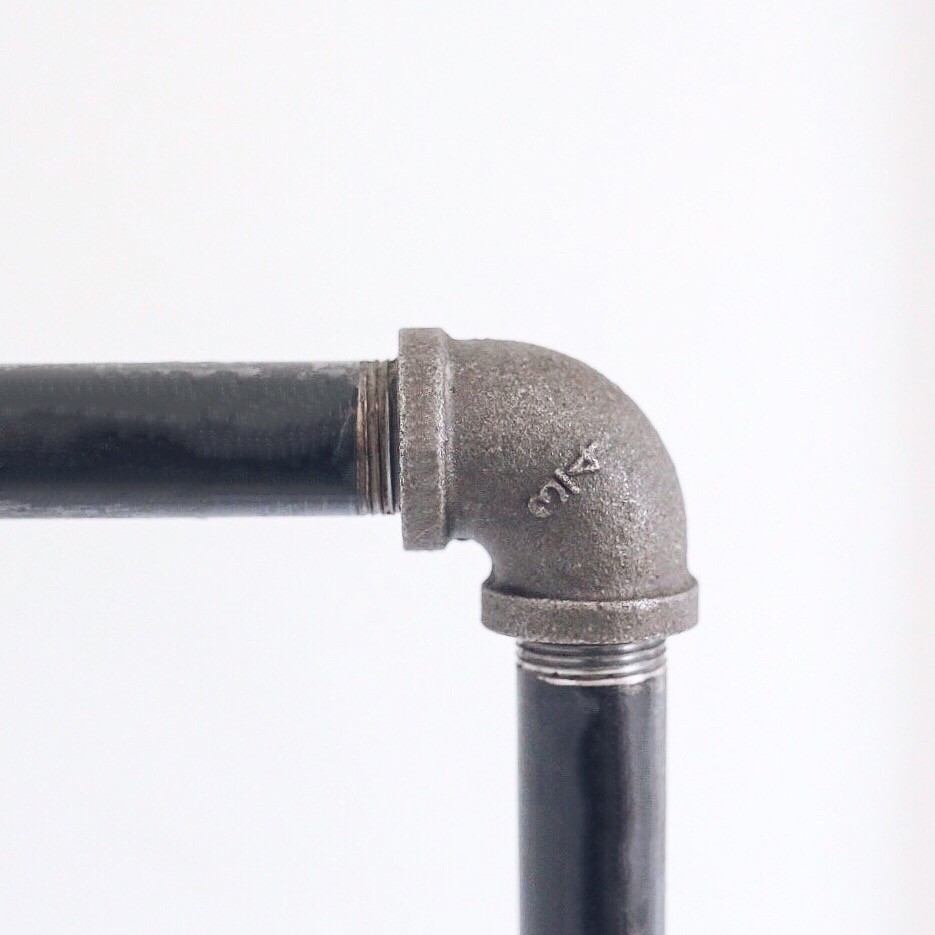
– (2) 1” pipe elbows
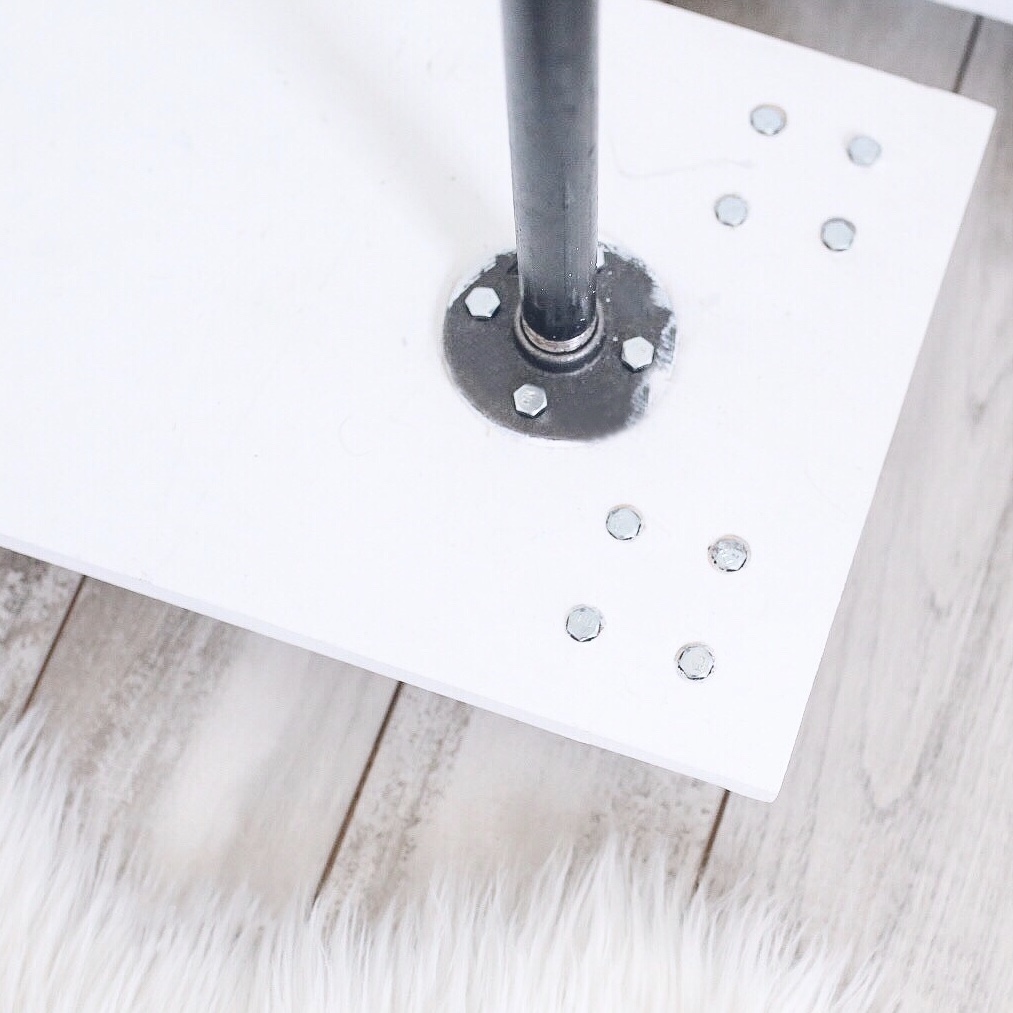
– (2) 1” floor flange
– (12) 2” long wood screws
– (8) #12 1-¼” screws
– (16) #10 x 1” screws
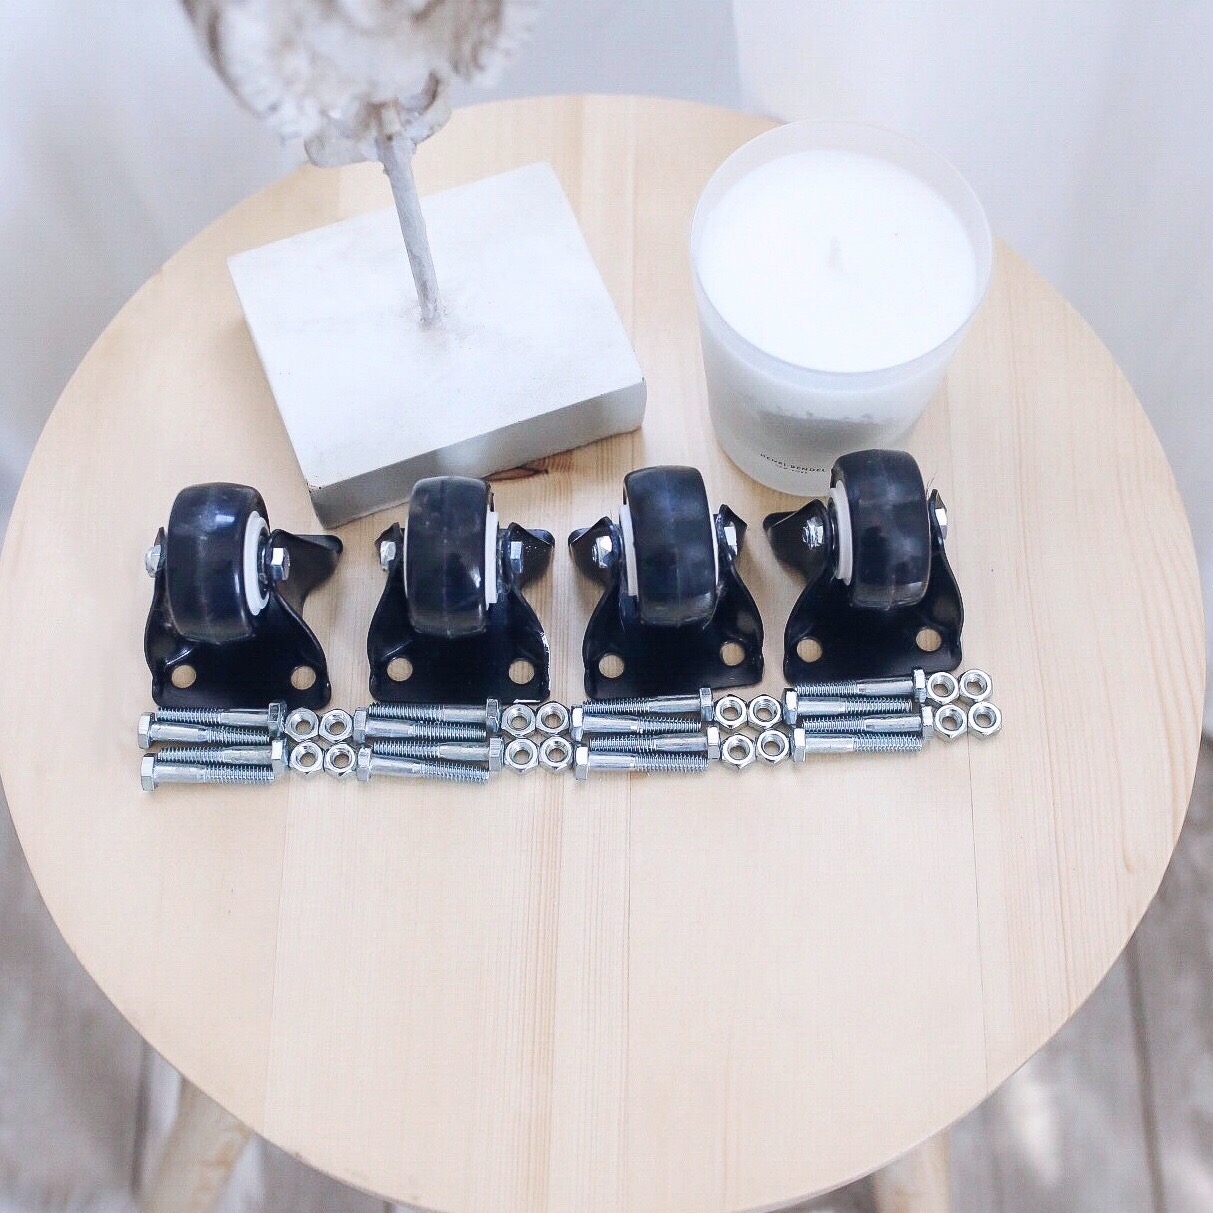
– (4) Casters (swiveling wheels)
– Cordless drill
– Circular saw
– Measuring tape
– Pen
– Drop cloth
– 1 quart dark stain
– Paint brush
– Rags
– Oil rubbed bronze spray paint
– Antique or brushed gold spray paint
– Disposable gloves
– Eye protection
– Sanding block
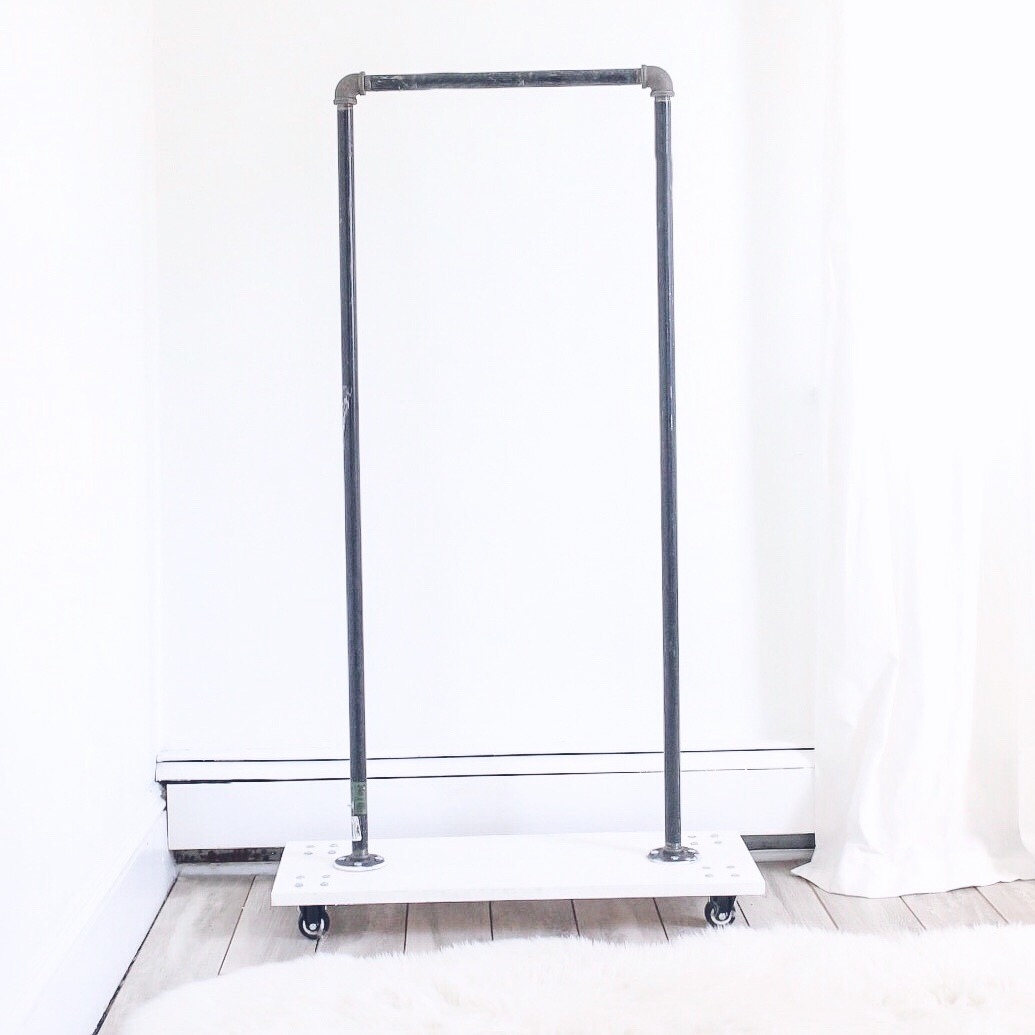
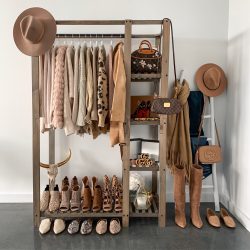
A steel plumbing pipe might be one of the most versatile building materials. The best part is the mixture of steel pipe and old wood give the clothing rack a timeless industrial look that fits nicely into a wide variety of settings. Whether you’re looking for a clothing storage solution for your studio apartment, or you’re a retailer looking for a way to display clothing, this rack will do the trick with adding a little spark to your space. It’s also very durable and simple to break down. Here’s a breakdown on how to build it!
1. Pick up two 4 foot long pre-cut shelves at your local home improvement store. When you get them home, place the pretty side down on your work area.
2. Stain the base. Lay a drop cloth down for staining or painting. I chose to paint mine. If you choose to stain, you should brush on the stain, then wipe off with a rag. Make sure to use a fresh rag for this step. Once you are finished staining, set the base aside to dry
3. If you’re not using a jigsaw, you can pick up an 8-foot-long piece of 1×4” at the home improvement store and ask them to cut a few 18” long pieces. If you are doing it a home, measure, mark and cut them yourself. Don’t forget to wear eye protection. Cut at least four boards, as they support the rolling base.
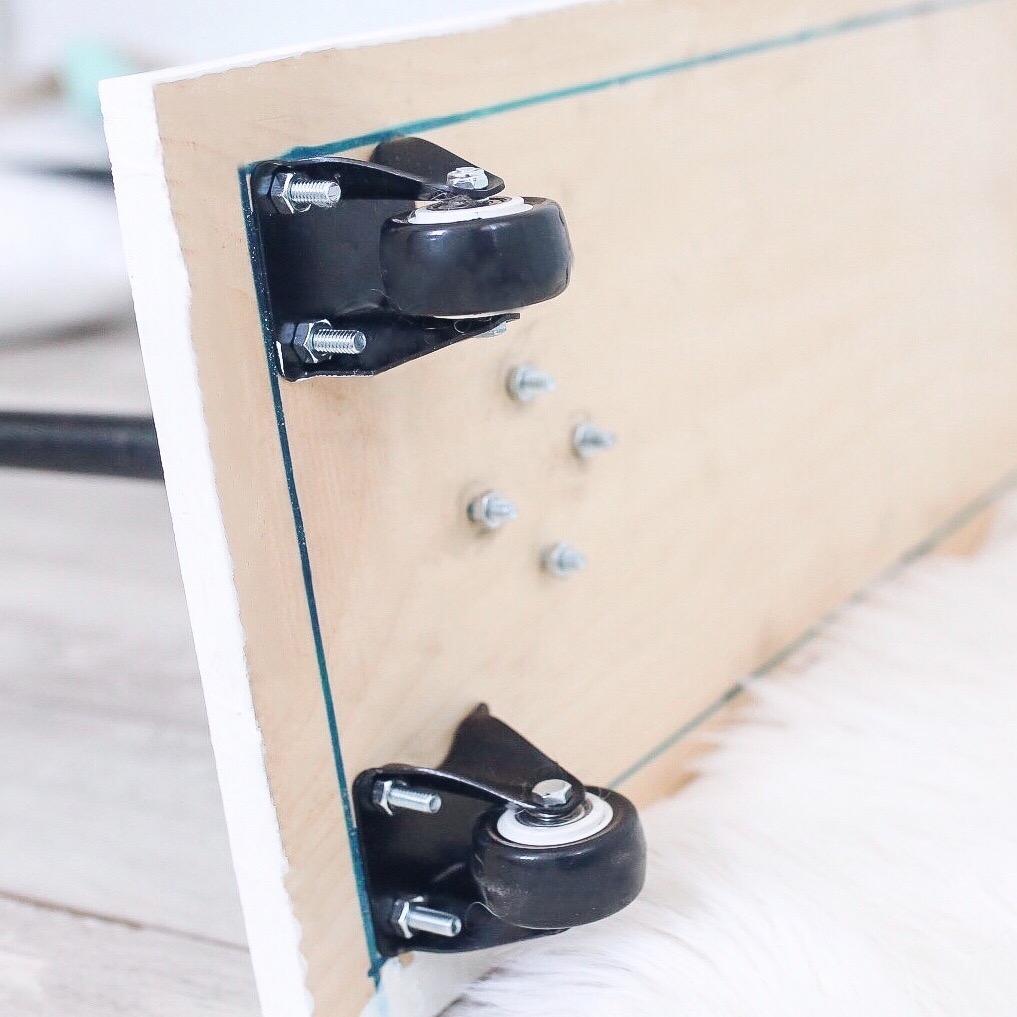
4. Once your 1x4s are cut, lay them out across the shelving boards and fasten together using 2-inch wood screws, make sure to keep the two shelving boards butted together tightly as you work.
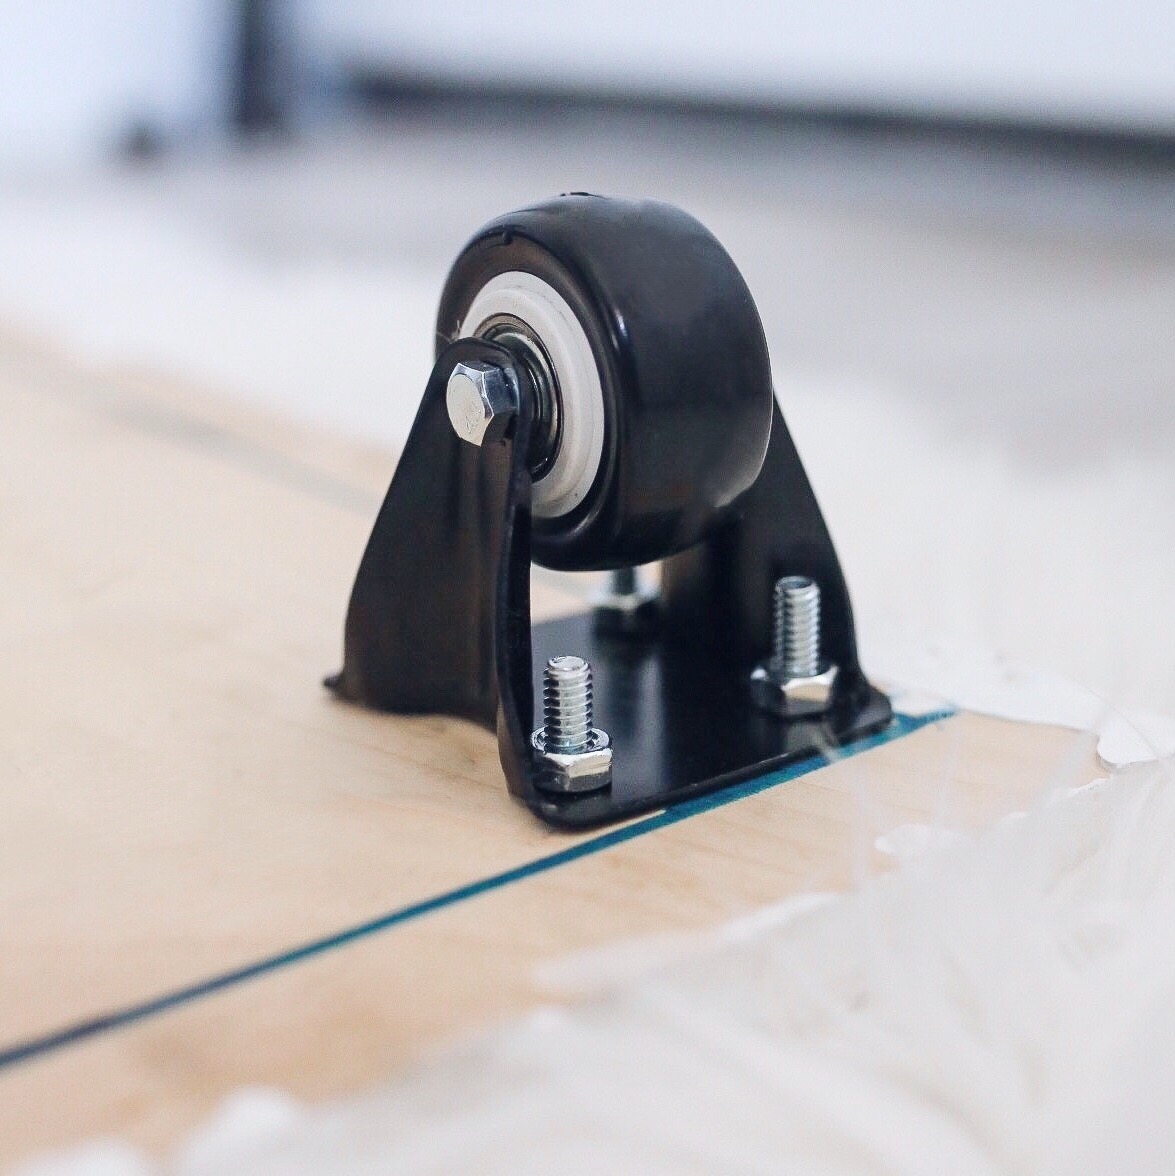
5. While you have the base flipped upside down, install the caster (swiveling wheels) on each corner. Before doing so, measure and mark for placement one inch from the edge. Fasten using 1-inch wood screws.
6. Once any stickers and excess oil is removed from the pipe, lay it down and attach the two elbows to each end of the 36-inch pipe. The attach the two 5-foot pieces to those elbows, creating an upside down “U” shape.
7. Next, attach the floor flanges to the bottom of each 5-foot pipe, and stand the rack up on a flat surface to make sure it doesn’t need any adjustments. If it wobbles, try making adjustments to the elbows.
8. Center up the floor flanges on the wooden base, making sure you have equal spacing on each side. Attach flanges using four 1-¼ inch wood screws in each flange. Have a friend hold the pipe in place while the other fastens the flanges to the base.
Extras: If you want to spray paint the pipes, you should do so after step 7 once the rack is fully assembled. Move the rack into a well ventilated area and spray-paint the entire pipe including the elbows and flanges. Then allow it to completely dry overnight before doing the final steps.


Comments
I would have never thought to DIY my own garment rolling rack. Yours looks amazing! And I love that throughout the process, you can customize it like painting the pipes!
http://www.rdsobsessions.com
this is such a great idea!! I love DIYs too
http://www.indecisivelystylish.com
You did an amazing job! I feel like this is really perfect for apartments or smaller spaces! I feel like I’d like this for my future home office, it would be a great background too or a spot to hang clothes without taking up needed closet space!
What a great idea!!! I love this!! Thanks so much for sharing- I really want to try and DIY one now!!
Brittany,
http://www.lawyerlookbook.com
Such a cute rack and I love that it is a DIY and you can make it to the size you need!! Genius!
SUCH a good post babe!! I need to make one of these, it makes styling so much easier. Love all these pics xo
I have been dying to put one of these in my apartment! Definitely gonna try and build my own. Awesome post!
xo
Brooke
http://www.brookekenney.com
Omg, I absolutely love this! Such an awesome DIY, going to bookmark this!
Kileen
cute & little
I wish I was handy and loved doing diy projects!! Seem so fun!
What a great idea! I already have two in my office otherwise Id make another haha!
Liz
This is so cute! I took the easy way out and just bought one already assembled!
xo Jessica
http://www.whatsfordinneresq.com
Genius! You’re inspiring me to give this a try!